Top Menu

Saturday, March 31, 2018

Dream catcher

Hi everyone, Heather with you today to show you how to make a dream catcher with various items from GSLcuts.com, other than the actual dreamcatcher, which is in the store. I thought that it would be fun to invent my own, so here it is.


First  of all I decided which items to use and I chose the ones above to begin with, and as usual I forgot to take a photo of them all before I put Gesso on them hence the mixed photo. However I did remember to take a photo of the feathers, (below) then I covered these with Gesso.
I found some blue paper with clouds on it and decided that it would be nice as a background on the air balloons that I used in the middle. I used a small flower shaped die to go in the middle of the balloons and decided that two would look better than one so I stuck these together then glued them onto the balloons and added a deep red ready made rose in the middle of the flowers. I used my hot 
glue gun to stick these together because I thought it would 
give it strength and stick together better

I wanted the flowers in the centre of the balloons to stand out a bit so I used the large and small scalloped punch elements stuck together with 2mm. thick foam tape, then glued the flowers into the centre of these.
The baskets of the air balloon were stuck on top of each other to form the centre then I stuck the dream word element  that I had coloured blue with distress ink onto a spare flower and glued this in the centre. This formed the basic shape that I wanted for my dreamcatcher. 
I needed some flimsy feathers to go onto my gsl feathers, and I hadn't got any, so my daughter kindly posted some to me and as you can see I edged the GSL feathers with blue distress ink then stuck the flimsy feathers onto the back. I had some white wire with white pearls on the end of them that made a spray of three so I stuck these to the front of my feathers and tied them to the bottom of the dream word element, so that they just hung loose, then I glued the remaining two GSL feathers into the side of the balloons just to give a bit of a feature. A piece of satin ribbon with a bow in the middle to hang it with was glued onto the back of the balloons and I have my (make it myself) dreamcatcher. Hope  you might be inspired to make one as well. It is a little bit "fiddly" in places but really good fun to make.
GSL Items used:

Friday, March 30, 2018

Bulletin Board

Hello everyone.  Gina here today with a quick and easy project I made for my office.  This bulletin board was made using the Dome Display Tray .  I began by painting the front layer of the display tray.
I painted my tray with black chalk paint. 
I used some cork squares that I had already purchased for my office.  I traced around the back layer and cut the cork to shape using a sharp knife.
I glued the cork to the back layer using quick grab glue.
I chose some papers and cut to size for some of the openings in the tray.  I attached these pieces to the back of the front layer.
Once I had the papers attached I used quick grab glue to attach the front layer to the cork layer.
I decorated the dome using some chipboard pieces and hung using a binder clip.

Gypsy Soul Laser Cuts products used:

Thursday, March 29, 2018

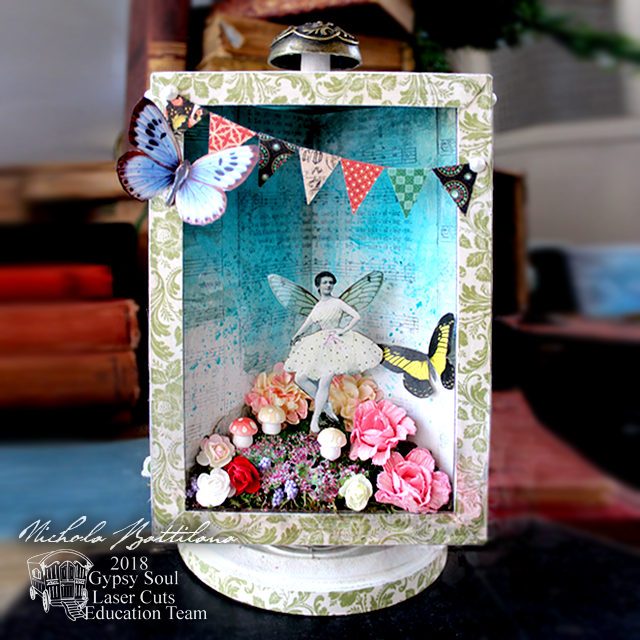
Floral Fairy Dimensional Diorama

I've had my eye on the Dimensional Diorama for a while and finally got my hands dirty and made a pretty something with it.

Floral Fairy Dimensional Diorama - gslcuts.com Nichola Battilana

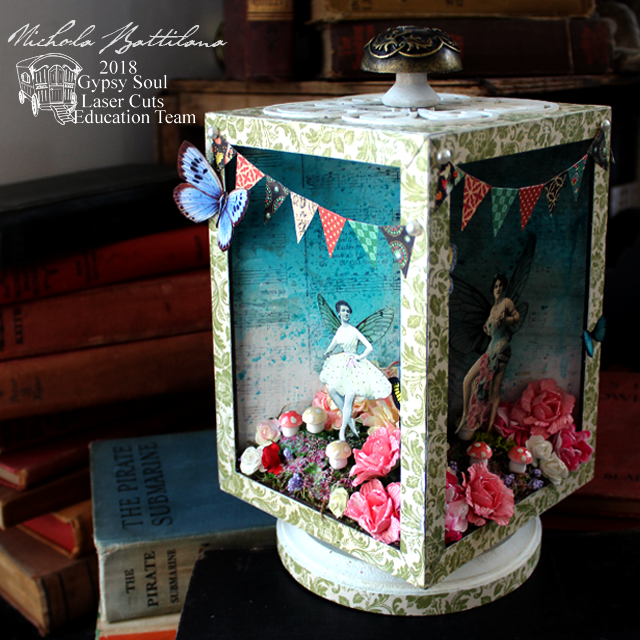
This diorama box frame sits on a spinner to show off 4 different segments. I had thought about creating a diorama dedicated to each of the seasons... but it's far too spring-like to think back to winter.

Floral Fairy Dimensional Diorama - gslcuts.com Nichola Battilana

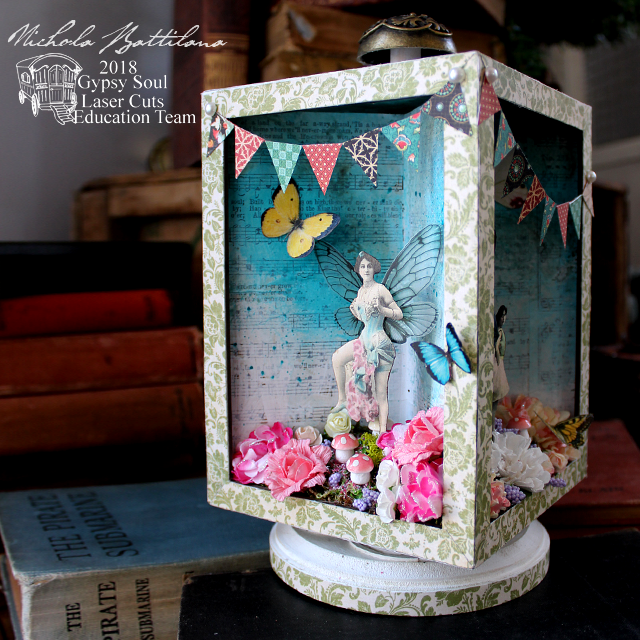
I've forgotten about snow and Autumn leaves and instead filled each section with moss, flowers, butterflies and pretty paper fairies.

Floral Fairy Dimensional Diorama - gslcuts.com Nichola Battilana

Inside I've used pages from damaged hymnals and the exterior is decorated with Graphic 45's Once Upon a Springtime collection.

Floral Fairy Dimensional Diorama - gslcuts.com Nichola Battilana

I've added a simple wooden plaque as a base for the lazy susan mechanism (which comes with the diorama box).

Floral Fairy Dimensional Diorama - gslcuts.com Nichola Battilana

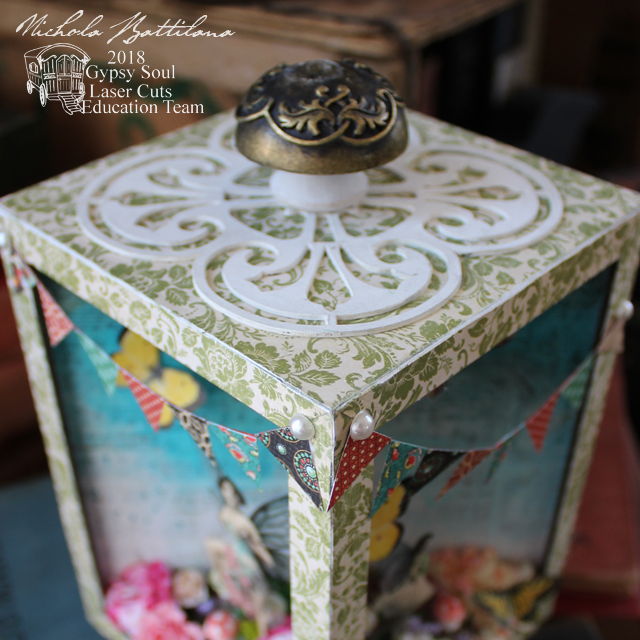
On top of the box I've added Tudor Rose Singles and created a handle with a wooden spool and a large staples door knob from Graphic 45. Final touches include a little handmade bunting and flat back pearls.
Floral Fairy Dimensional Diorama - gslcuts.com Nichola Battilana

If you'd like to create your own version of this project I have a video walk through with some tips and hints you might find helpful.

And here are all the bits you'll need!

Dimensional DioramaTudor Rose Singles 

Decorative papers (I've used Graphic 45 papers)
Paper flowers
English Fairy Garden Collage Sheet
Fairy Wings Collage Sheet
Moss
Wooden plaque
Flatback pearls (or other embellishments)
Florist Oasis
Vintage Images (I downloaded them free from thegraphicsfairy.com)
Glue
Acrylic Paint
Wooden toothpics or stir sticks


Wednesday, March 28, 2018

Love lives here by Cherry Nelson

Happy Spring! Cherry here at the GSLC blog today.  I have a fun 3d project to share with you all.  I lost half a Sunday assembling and creating this and it was so enjoyable.  Don't you love getting lost in art?


I started with the Standing Flip Book.  This kit comes with several chipboard pages but I used only one and decorated both sides of it.  So Depending on your mood you can switch out what side you want to see.


 I painted the whole flip book first with white acrylic paint.


 I then covered all my other chipboard pieces-windows-six panel, folding house shrine
 valentine heart shapes


 I added borders to both sides of the flip book.


 I added ribbons to both sides and added my main focal points.


 I assembled my cute tag that I attached to my rings.


 I distressed the flip book all over, especially the edges.


Here is my project completed.


 Isn't the mini house adorable? 


 Here is the other side.


Hope you enjoy! Thank you for visiting the GSLC blog!  Cherry


GSLC Supples-

Tuesday, March 27, 2018

Storage Cabinets Extravaganza!

Hi crafty folks!  It's Susan, here.  I'm really excited to share a special craft room organization tip:  get thee to Gypsy Soul Laser Cuts right away!  Our laser queen recently designed a series of stackable storage units with multiple drawers as well as a Sickles-size storage tray.  Today I have three of the storage units to share with you.


I started on the 6 Drawer Chest by setting aside the the drawer parts and laying out all the chest pieces.  You can see here the bottom, sides, and back. Slide the half split pieces (two large, one small)  together to form the center supports.


Glue on the back, sides, then bottom and top pieces.  I use a fast-setting white glue so I only have to hold the pieces for a short bit. A heavy object helps, too.


In this photo I've added the back and sides.


While the chest glue is drying, assemble the drawers. As usual, it's more efficient to lay out the sides before gluing.


Et voilĂ ! A 6 drawer storage chest that is ready for decoration.


To cut the drawer fronts, outline it (including the thumb notch) on the revers side of your paper. Cut out with a trimmer or scissors and attach to the drawer fronts.


Next I put the 3 Drawer Chest together  -- lay it out, glue the center supports, then top and bottom.  Finish with the sides.


Assemble the drawers!


Once all the decorative paper drawer fronts are outlined, cut and attached you can finish by sanding the edges and inking brown.


To speed the process up, I used a brown marker on the sanded white paper edges and finished with swipes of brown ink.


The final piece of today's storage extravaganza is the Stickles tray!


Glue it all together.  I painted with black gesso and matte black acrylic paint.


Finished!


Isn't this great?! Now I have tons of storage where there was only a Stickles basket.  If these pieces are not already in the store, they will be soon!


Thanks for visiting today.  Please share your Gypsy Soul on our Facebook Craft Group!  Happy crafting!

Cheers,
Susan


GSL Cuts Used
6 Drawer Chest #OC4 (coming soon!)
3 Drawer Chest #OC1 (coming soon!)
Stickles Holder OC5 (coming soon!)

Other Supplies Used
Graphic 45 paper
Mod Podge
Ranger brown ink
Ranger brown marker
Liquitex Varnish
Black gesso
Black acrylic paint